“The Nest is best by test!”
In these posts I have discussed the two most important Goodman setups: the Goldilocks and the Molokai. Beyond those are the 3-S, FireStarter and Return setups, perhaps to be covered in a later post. I now believe that the Goodman Line can be treated as a setup as well, since it represents a “fresh start” after achieving the Under and Over Tipping Points.
What Is a Goodman Nest?
A Goodman Nest occurs when one of these two setups forms at the end of another, larger one. A nest builds at the EP (Ending Point) of the Back Matrix (BMX) of either a Goldilocks or Molokai setup. The third swing of the Back Matrix (the “SPS of the SPS”) is the nest Jumbo.
With some practice it is certainly possible to see both the setup and the nest on a single time-frame chart. That said, it is often easier to study and analyze them at different time-frames. For example, if the larger setup is shown on a 4-hour chart, the nest may be best viewed on a 15-minute chart. Bar spacing can also help; to each, his own. The size relationship between the setup and its nest varies, and only experience will aid the trader in seeing them clearly.
The Four Possible Nests
There are four possible Goodman Nests.
Goldilocks to Goldilocks

Goldilocks to Molokai
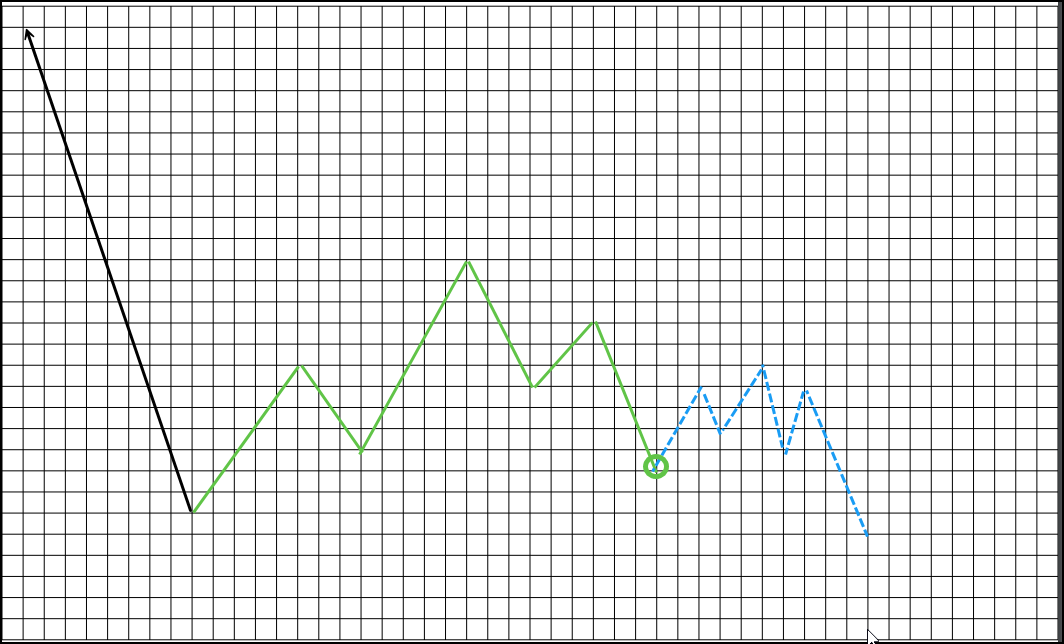
Molokai to Molokai
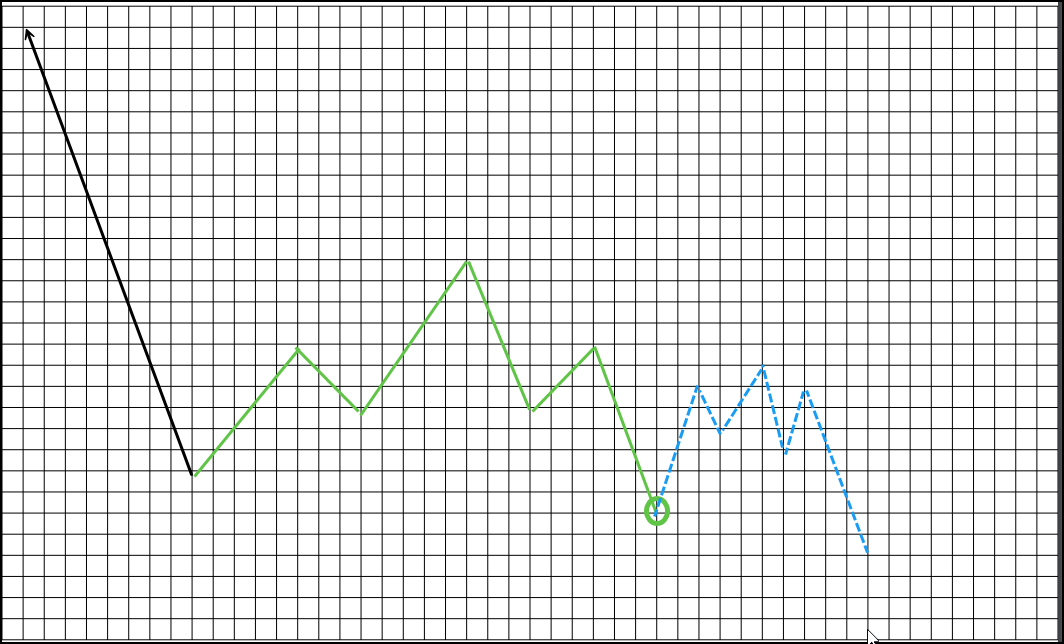
Molokai to Goldilocks
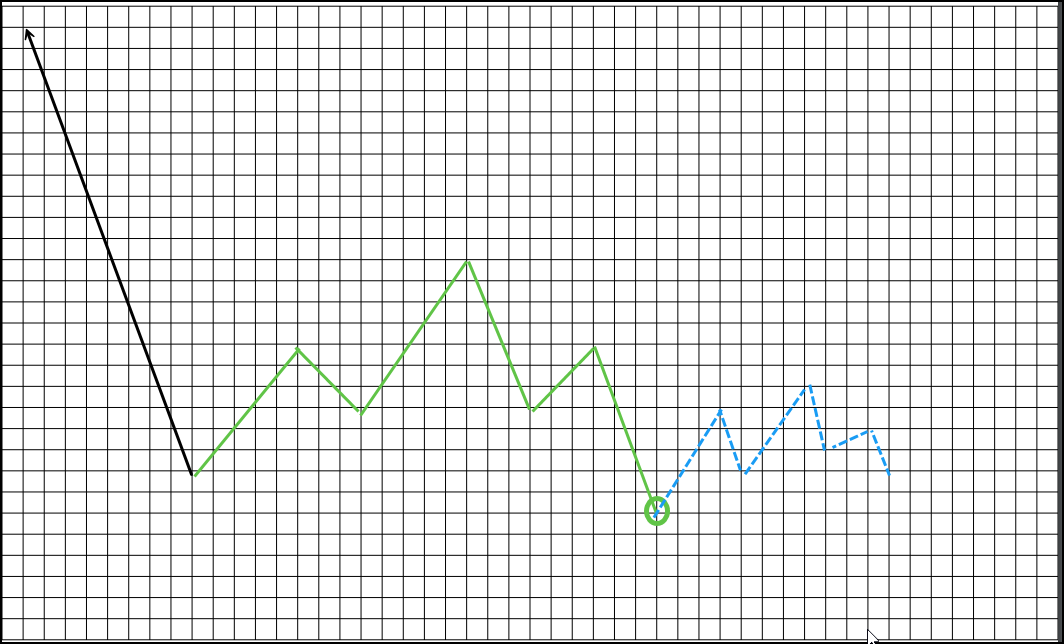
Goodman traders are always happy to see one of these four nests appear. They are highly reliable and the risk-reward parameters are typically excellent. The Molokai-Molokai nest makes them especially delighted.
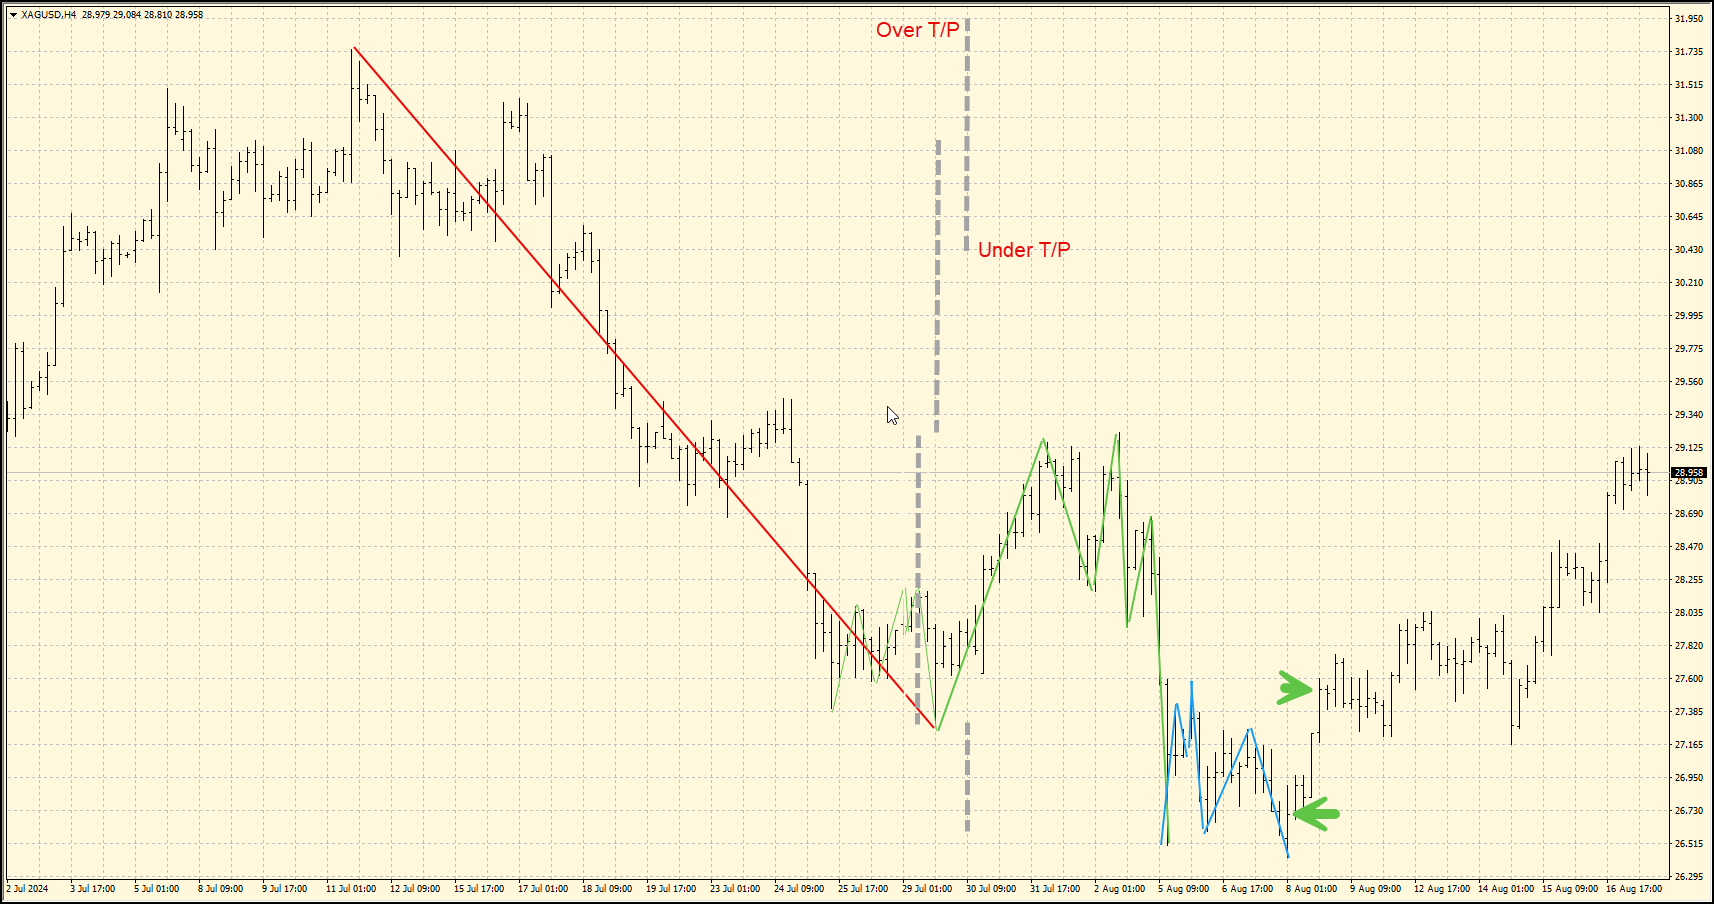
In this Silver example, the Under count of the nest has been met, so the trade is in Line mode relative to the nest. The Under and Over of the main setup have yet to be met, but here the trader is very close to Break Even.
Nest Money Management
There are multiple money management strategies for a nest. For example, a trader could trade both setups per Goodman, dividing the initial lot into two equal parts, one for each setup. There are several others beyond the scope of this short post.
Nest Versus Repropagation
A Goodman Nest should not be confused with a Repropagation. This occurs when a setup propagates into a larger setup. Given a long Jumbo, it is not uncommon for the first propagation/setup to be too small to follow. One waits for a repropagation to a larger setup.
This post is educational commentary. It is not investment advice. Trading futures and FX involves substantial risk of loss.
Good Trading!
Michael Duane Archer
Related Reading
- The Molokai Setup: What to Do When the Goldilocks Fails
- The Goodman Micro-Nest: A Setup at the End of the Nest
- Goodmanisms: Charlie Goodman’s Sayings on Trading, Explained
Keep Learning the Goodman Way
If this article was useful, these are the next steps:
- The Method: propagation, intersection and the 3-C Principle, drawn plate by plate.
- The Goodman Library: the books, from Goodman for Grasshoppers to The Goodman 6 & 6.
- The Trader’s Playbook: the Molokai setup in one printed, numbered volume.
- Mentoring: work one-on-one with the authors.